


How to calibrate a high speed labeler?
Nov 20, 2025
Leave a message
Calibrating a high speed labeler is a crucial process that ensures accurate and efficient labeling operations. As a supplier of high speed labelers, I understand the importance of proper calibration to achieve optimal performance. In this blog post, I will share some valuable insights on how to calibrate a high speed labeler effectively.


Understanding the Basics of High Speed Labeler Calibration
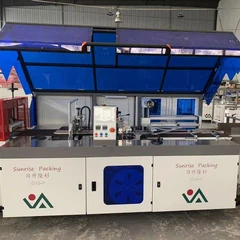
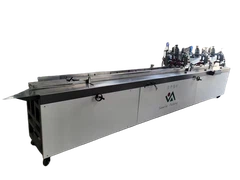
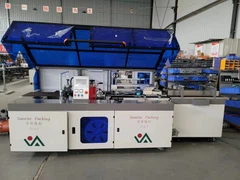
Before diving into the calibration process, it's essential to have a clear understanding of what high speed labelers are and how they work. High speed labelers are advanced machines designed to apply labels to products at a rapid pace, typically in high-volume production environments. These labelers use various technologies, such as pressure-sensitive labeling, hot melt adhesive labeling, and shrink sleeve labeling, to ensure precise and consistent label application.
Calibration is the process of adjusting the labeler's settings to ensure that it applies labels accurately and consistently. This involves setting the correct label length, width, and position, as well as adjusting the speed and pressure of the labeling process. Proper calibration is essential to prevent label misalignment, wrinkling, or peeling, which can lead to product defects and production delays.
Pre-Calibration Checks
Before starting the calibration process, it's important to perform a series of pre-calibration checks to ensure that the labeler is in good working condition. Here are some key checks to perform:
- Inspect the Labeler: Check the labeler for any signs of damage or wear, such as loose belts, worn-out rollers, or damaged sensors. Replace any damaged parts before proceeding with the calibration.
- Clean the Labeler: Remove any dust, debris, or adhesive residue from the labeler using a clean, dry cloth. This will help to ensure accurate label detection and application.
- Check the Label Roll: Make sure that the label roll is properly loaded onto the labeler and that the labels are aligned correctly. Check for any wrinkles, tears, or misaligned labels on the roll.
- Verify the Label Size: Measure the length and width of the labels using a ruler or caliper. Make sure that the labeler is set to the correct label size to ensure accurate label application.
Calibrating the Label Length and Width
The first step in calibrating a high speed labeler is to set the correct label length and width. This is important to ensure that the labels are applied accurately and that there is no excess label material. Here's how to calibrate the label length and width:
- Access the Labeler Settings: Use the labeler's control panel or software to access the label settings menu. Look for options related to label length, width, and pitch.
- Enter the Label Dimensions: Enter the measured length and width of the labels into the labeler's settings. Make sure to enter the dimensions accurately to ensure precise label application.
- Adjust the Label Pitch: The label pitch is the distance between the start of one label and the start of the next label. Adjust the label pitch to match the label size and the spacing requirements of your products.
- Test the Label Application: Run a test label application to verify that the label length and width are set correctly. Check the labels for any signs of misalignment, wrinkling, or peeling. If necessary, make further adjustments to the label settings.
Calibrating the Label Position
Once the label length and width are set correctly, the next step is to calibrate the label position. This involves adjusting the labeler's settings to ensure that the labels are applied in the correct position on the products. Here's how to calibrate the label position:
- Position the Product: Place a sample product on the labeler's conveyor or platform. Make sure that the product is positioned correctly and that it is centered on the conveyor.
- Adjust the Labeler's Positioning System: Use the labeler's positioning system, such as a guide rail or alignment tool, to align the labeler with the product. Make sure that the labeler is positioned correctly and that the labels will be applied in the desired location on the product.
- Set the Label Placement Offset: The label placement offset is the distance between the edge of the product and the edge of the label. Adjust the label placement offset to ensure that the labels are applied in the correct position on the product.
- Test the Label Application: Run a test label application to verify that the label position is set correctly. Check the labels for any signs of misalignment or incorrect placement. If necessary, make further adjustments to the labeler's positioning system or the label placement offset.
Calibrating the Labeling Speed and Pressure
In addition to calibrating the label length, width, and position, it's also important to calibrate the labeling speed and pressure. This is important to ensure that the labels are applied smoothly and that there is no damage to the labels or the products. Here's how to calibrate the labeling speed and pressure:
- Set the Labeling Speed: Use the labeler's control panel or software to set the labeling speed. The labeling speed should be set based on the type of labels, the size of the products, and the production requirements. Start with a slow speed and gradually increase it until you achieve the desired labeling speed.
- Adjust the Labeling Pressure: The labeling pressure is the force applied by the labeler to the labels during the application process. Adjust the labeling pressure to ensure that the labels are applied firmly but not too tightly. Too much pressure can cause the labels to wrinkle or peel, while too little pressure can result in poor label adhesion.
- Test the Label Application: Run a test label application to verify that the labeling speed and pressure are set correctly. Check the labels for any signs of damage, such as wrinkles, tears, or peeling. If necessary, make further adjustments to the labeling speed or pressure.
Fine-Tuning the Calibration
Once the initial calibration is complete, it's important to fine-tune the calibration to ensure optimal performance. This involves making small adjustments to the labeler's settings based on the results of the test label applications. Here are some tips for fine-tuning the calibration:
- Check the Label Alignment: Check the labels for any signs of misalignment, such as skewed labels or labels that are not centered on the products. If necessary, make small adjustments to the labeler's positioning system or the label placement offset to correct the alignment.
- Inspect the Label Adhesion: Check the labels for any signs of poor adhesion, such as labels that are peeling or lifting off the products. If necessary, adjust the labeling pressure or the type of adhesive used to improve the label adhesion.
- Monitor the Labeling Performance: Monitor the labeler's performance over time to ensure that it continues to apply labels accurately and consistently. Make any necessary adjustments to the labeler's settings as needed to maintain optimal performance.
Conclusion
Calibrating a high speed labeler is a critical process that ensures accurate and efficient labeling operations. By following the steps outlined in this blog post, you can calibrate your high speed labeler effectively and achieve optimal performance. Remember to perform regular maintenance and calibration checks to ensure that your labeler continues to operate at its best.
If you're in the market for a high speed labeler, I encourage you to check out our High Speed Labeler product page. We also offer a range of Automatic Labeling Machine and Automatic Label Dispenser options to meet your specific labeling needs. Contact us today to learn more about our products and to discuss your labeling requirements.
References
Send Inquiry