




How to replace the cutting blade of a sealing and cutting machine?
Sep 01, 2025
Leave a message
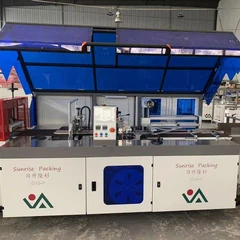
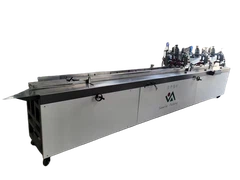
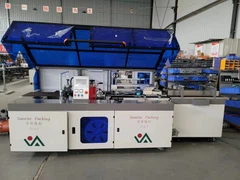
Hey there! As a supplier of sealing and cutting machines, I often get asked about how to replace the cutting blade of these machines. It's a crucial maintenance task that can significantly impact the performance and longevity of your equipment. So, let's dive right in and explore the step-by-step process of replacing the cutting blade.
Why Replace the Cutting Blade?
Before we jump into the replacement process, let's quickly understand why blade replacement is necessary. Over time, the cutting blade of a sealing and cutting machine can become dull or damaged due to regular use. A dull blade can lead to uneven cuts, poor sealing quality, and increased wear and tear on the machine. By replacing the blade at the right time, you can ensure smooth operation, precise cuts, and high-quality seals.
Tools You'll Need
First things first, gather the necessary tools for the job. Here's what you'll typically need:
- Screwdriver: Depending on your machine, you might need a Phillips or flathead screwdriver to remove the screws holding the blade in place.
- Replacement Blade: Make sure you have the correct replacement blade for your specific sealing and cutting machine model. You can usually find these blades from the machine's manufacturer or authorized suppliers.
- Safety Gloves: To protect your hands from sharp edges and potential injuries, it's essential to wear a pair of safety gloves.
- Cleaning Cloth: A clean cloth will come in handy for wiping away any debris or dust from the blade area.
Step-by-Step Guide to Replacing the Cutting Blade
Now that you have all the tools ready, let's walk through the blade replacement process:
Step 1: Power Off the Machine
Safety first! Before you start working on the machine, make sure it's completely powered off and unplugged from the electrical outlet. This will prevent any accidental start-ups and keep you safe during the replacement process.
Step 2: Locate the Blade Housing
The next step is to find the blade housing on your sealing and cutting machine. This is usually located near the cutting area and is held in place by screws. Refer to your machine's user manual if you're having trouble finding it.
Step 3: Remove the Screws
Using the appropriate screwdriver, carefully remove the screws that are securing the blade housing. Keep these screws in a safe place so you don't lose them.
Step 4: Take Out the Old Blade
Once the screws are removed, gently lift the blade housing to expose the old cutting blade. Be careful not to touch the sharp edges of the blade. You may need to use a pair of pliers to carefully remove the old blade from its holder.
Step 5: Clean the Blade Area
Before installing the new blade, take a moment to clean the blade area with a cleaning cloth. Remove any debris, dust, or residue that may have accumulated over time. This will ensure a smooth installation and optimal performance of the new blade.
Step 6: Install the New Blade
Now it's time to install the new cutting blade. Carefully place the blade into the holder, making sure it's properly aligned. Double-check that the blade is securely in place before proceeding.
Step 7: Reattach the Blade Housing
Once the new blade is installed, carefully lower the blade housing back into place. Align the screw holes and insert the screws. Tighten the screws firmly, but be careful not to overtighten them, as this could damage the housing or the blade.


Step 8: Power On the Machine and Test
After you've replaced the blade and reattached the housing, plug the machine back in and power it on. Perform a test cut on a scrap piece of material to make sure the new blade is working correctly. Check for clean, even cuts and proper sealing. If everything looks good, you're all set!
Tips for Maintaining Your Cutting Blade
To ensure the longevity and performance of your cutting blade, here are some useful tips:
- Regular Cleaning: Clean the blade regularly to remove any debris or residue that may accumulate during use. This will prevent the blade from becoming dull or clogged.
- Proper Storage: When not in use, store the machine in a clean, dry place. This will protect the blade from moisture and corrosion.
- Use the Right Material: Make sure you're using the appropriate material for your sealing and cutting machine. Using the wrong material can cause excessive wear and tear on the blade.
- Follow the Manufacturer's Guidelines: Always follow the manufacturer's instructions for blade replacement and maintenance. This will help you avoid any potential issues and ensure the optimal performance of your machine.
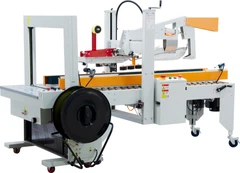
Different Types of Sealing and Cutting Machines
There are various types of sealing and cutting machines available in the market, each designed for specific applications. Here are a few popular ones:
- Plastic Bag Cutting and Sealing Machine: These machines are specifically designed for cutting and sealing plastic bags. They're commonly used in packaging industries for products like food, clothing, and electronics.
- Food Packing Sealing and Cutting Machine: Ideal for the food industry, these machines ensure proper sealing and cutting of food packages, keeping the contents fresh and protected.
- Side Sealing and Cutting Machine: This type of machine is used for sealing and cutting the sides of packages, providing a professional and secure finish.
Conclusion
Replacing the cutting blade of a sealing and cutting machine is a relatively straightforward process that can be done with the right tools and a little bit of know-how. By following the steps outlined in this guide and taking proper care of your machine, you can ensure smooth operation, precise cuts, and high-quality seals.
If you're in the market for a new sealing and cutting machine or need replacement parts, don't hesitate to reach out. We're here to help you find the best solution for your packaging needs. Whether you're a small business owner or a large-scale manufacturer, we've got the expertise and products to meet your requirements.
References
- Sealing and Cutting Machine User Manuals
- Industry Best Practices for Machine Maintenance
Send Inquiry